Monday, 31 July 2017

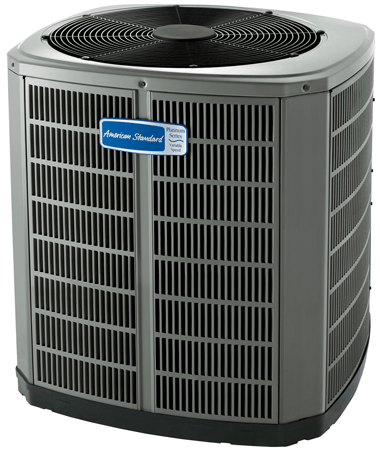
Air Conditioner Making Noise

A frequent problem which homeowners experience is their air conditioner making noise, but this problem often has a simple solution.

The high pitched sounds which people often hear coming from their AC unit happens when there is an insufficient amount of air flowing through the return vents, which may be happening due to a variety of issues.

A dirty filter is often seen as the main culprit behind an air conditioner making noise. There may be a blockage in the return vents, the dampers may be closed, or there simply may be too many doors closed in your home.

This high pitched noise is emitted when there isn’t enough air received by the blower which results in an increase in pressure and the noise of your air conditioner system becomes louder. Hearing these sounds should indicate to you that there is something wrong with your HVAC system which needs to be fixed sooner than later or else it may become costlier to repair in the future. With a lowered flow of air, the system also has to work harder to cool your home. This will obviously result in an increase on your bills and can ruin your system in the long run.

How to Solve the Problem

Solving the problem all starts with figuring out what the issue is in the first place. The expertise of a trained DeMark Home Ontario HVAC technician may be necessary to determine the problem and provide you with the best possible solution.

Dirty Air Filters

As previously stated, dirty air filters are often the main culprit to an air conditioner making noise. It’s expected that as an air filter does its job it becomes jammed with dirt and dust. The solution to this is simple, just change your old air filter to a new one. An air filter should be changed every three months.

Closed Dampers

Checking around the home to make sure that none of the dampers are closed will easily stop the problem from persisting if this was the cause for the noise.

Too many closed doors

Leaving more doors open will ensure that the system has enough air and will make for better air flow throughout the home which could put an end to your air conditioner making noise.

Blocked supply or return vents

This could be as simple as furniture being in front of the vents or the vents being dusty. It should be noted that even if a room isn’t in use, you should still ensure that the vents aren’t being blocked as it can cause problems to the whole system.


Be sure to have regular maintenance performed on your central air conditioner by a licensed HVAC contractor as a preventative measure. If you are having central air conditioner problem and in need of service or replacement call us today at 647-847-2998 or fill out online request form and one of our friendly staff will get in touch with you as soon as possible.

Easy Rentals...

get total piece of mind with our High Efficiency Furnace and Air Conditioner Rental Program.

The post Air Conditioner Making Noise appeared first on DeMark Home Ontario Furnaces, A/C, Water Heaters.
Wednesday, 26 July 2017

Duct Cleaning – Before or after new furnace Air Conditioner installed?

If you decided to replace your old HVAC system with the new furnace Air Conditioner then it is also time to think about a duct cleaning.

Duct cleaning generally refers to the cleaning of various heating and cooling system components of forced air systems, including the supply and return air ducts and registers, grilles and diffusers, heat exchangers heating and cooling coils, condensate drain pans, fan motor and fan housing, and the air handling unit housing. Duct cleaning is a necessary step when you are planning to have new furnace and air conditioner installed. And here you can ask yourself a question. Should you replace your furnace and air conditioner before or after a duct cleaning?

Your air ducts should be definitely cleaned before replacing your old HVAC system with a new furnace air conditioner. A duct cleaning is an important way to make sure that your new furnace and air conditioner run properly and as efficiently as possible. Air duct cleaning will remove any built up dust, dirt, debris, or other contaminants from your air ducts. Dirty air ducts can become clogged, which makes your HVAC system less efficient.

Duct cleaning is an important part of furnace and air conditioner installation. Skipping a duct cleaning can impact the coil operation. The coil typically has small openings in it. These small openings can get covered with dust. If this occurs, the amount of airflow in your home can be reduced even when using a brand new equipment.

Without proper duct cleaning, the quality of air in your home and the efficiency of your new furnace  air conditioner can be affected.


If you are looking for HVAC system replacement in Ontario, DeMark Home Ontario can help. We provide quick and efficient HVAC replacement performed by our highly trained and experienced technicians. Call us 647-847-2998 or fill out online request form and we will be happy to assist you with your request.

Easy Rentals...

get total piece of mind with our High Efficiency Furnace and Air Conditioner Rental Program.

The post Duct Cleaning – Before or after new furnace Air Conditioner installed? appeared first on DeMark Home Ontario Furnaces, A/C, Water Heaters.

Friday, 21 July 2017

Preparing your HVAC System for Home Renovation

Home renovation is a frequent culprit behind HVAC system problems, learn how to plan ahead for these problems and keep your HVAC system running smoothly.

Quite surprisingly, a significant amount of problems related to HVAC systems are a result of dirt and dust. You wouldn’t think that something as small and insignificant can cause such problems, but as dirt and dust build up in your HVAC system, it can certainly cause problems. If you’re planning to or are in the process of home renovation, it would be a good idea on your part to take precautions to not harm your HVAC system in the process. Making sure your HVAC system is ready for home renovation is a simple process and can save you hundreds or possibly thousands of dollars on repair work in the future. Following these tips below can help you to prepare your HVAC system for home renovation.

  • Although obvious, it is necessary to clean up regularly. Stay aware of any dust or dirt buildup and sweep the floors often.
  • Ask your contractor about how to keep as much dirt and dust out of your home as possible. You can do this by keeping doors shut and using tarps when it’s possible.
  • Sanding and cutting wood is often involved in a home renovation, try to do these things outside of the house or in the garage.
  • Try not to run your air conditioner or furnace as often as possible while renovating, try to especially stray away from heating or cooling when cutting or sanding wood is being done in the home.
  • Keep the air vent covers/registers closed in the space where renovation is taking place. A good idea would be to tape them shut to keep dust from being pulled back into the HVAC system.
  • After your work is completed, change your air filter. Often times there are small particles caught in your air filter.


Following these simple steps during your home renovation will allow your HVAC system to continue running properly for years to come and will save you money on unnecessary and costly repair bills.


Home renovation is also a great time to upgrade your HVAC system to a brand new high efficiency system. Since home improvement is already being done, why not ensure that your home is comfier than ever by upgrading your HVAC system, especially if you have been experiencing problems with your current system.

DeMark Home Ontario will be happy to assist you with all of your HVAC needs whether it is regarding heating, cooling or whatever it may be, we are here to help. Please feel free to give us a call at 647-847-2998 or fill out our online enquiry form and we will get in touch with you as soon as possible.


The post Preparing your HVAC System for Home Renovation appeared first on DeMark Home Ontario Furnaces, A/C, Water Heaters.

Saturday, 8 July 2017

When is it time for an AC Replacement?

AC Replacement is often done out of necessity, but how can you easily tell when it’s needed?

It’s recommended that you replace your air conditioner before it reaches the point of total breakdown and is rendered useless. When an AC replacement is done ahead of time it allows you to not have to worry about being left without cold air in a hot and humid home this summer or possibly later, and ensures that you’re prepared for the summer months ahead. Scheduling an appointment can be done at any time, you can plan the appointment, and make sure that you’re getting what you want and what is needed for your home — hassle free and cost effective.

Although, who would want to replace an air conditioner that still has life left in it? Here’s how to know when it’s really time for AC replacement.

  • Expensive Repair Fees. When fixing your old system becomes too pricey for your wallet to justify it, it may be redundant to continue repairing your current system. If repairs are costing you more than half the price of a new system, then it’s time for an upgrade, especially if your current AC unit is over ten years old. If you’re doing repairs on your system now, then it’s likely that there’ll be more repairs in the future which will exceed the cost of an AC replacement.
  • Your current AC unit is too old. When your AC unit has been used in your home for 10+ years, it starts to become old and inefficient, and around this time is when it would be in your best interest to consider AC replacement. Replacing your old AC unit means that you won’t have to worry about experiencing an unexpected air conditioner breakdown in the near future, and your new AC unit will cost less for you to run each month.
  • Your AC unit isn’t the proper size for your home. When your AC isn’t the right size it may require an early replacement. An undersized AC unit might not satisfy your home’s cooling needs, and will at some point become overworked. An oversized AC unit may short cycle and end up burning out by using energy to start up more regularly than it’s intended to.


If you are looking to get an air conditioner estimate, have questions about the upgrade, payment options and more; please don’t hesitate to contact DeMark Home Ontario your heating and cooling expert. Demark Home Ontario specialist will be happy to assist you with any enquiries, book your free in home assessment and provide you with an air conditioner estimate. Call today at 647-847-2998

The post When is it time for an AC Replacement? appeared first on DeMark Home Ontario Furnaces, A/C, Water Heaters.

Sunday, 2 July 2017

How to Drain Water Heater

In order to keep your water heater running in tip top shape, you must drain water heater every six to twelve months.

Draining your water heater at least once or twice a year is recommended to remove any possible sediment or build-up that collects at the bottom of the tank. This sediment buildup can cause your water heater to need to work harder to heat the water, which would also use more energy and cost you more money.

To drain water heater is quite simple, but here is some steps to follow and things to expect before you start the process.

  • You must be prepared for the chance of a leak. The drain valve may not fully close after you open it up to drain water heater. The drain valve has been closed for six months to a year, or possibly longer, and the longer it stays shut the more likely it is that it won’t close completely the next time. If this problem does occur you can put a cap over the drain valve or purchase a new drain valve entirely. If your water heater currently uses a cheap plastic valve it would be a good idea to make an upgrade.

Here are the steps that you should follow to drain water heater:

Step 1:

Before you get shut off the water perform a quick flush. You can do this by connecting a garden hose to your drain valve and try to flush the water tank while the water pressure is still on. To flush the water tank you should open the drain valve for a few seconds and then close it again. This should result in the pressure to blow out any of the sediment stuck in the valve and will help the tank to drain faster. If there is a lot of sediment coming out, repeat this process as many times as you see necessary.

Step 2:

The second step is shutting off your water heater. Shut off the gas to your water heater, or if it is an electric heater then turn off the power. Now you can shut off the water, which is done by either using the valve located in the cold water pipe above your water heater or the main water supply valve to your home. To make sure that the pressure is off you should test the water faucets around the house, checking if hot water is still running.

Step 3:

Now, with your drain hose attached, open the drain valve. Not much water will drain until the vacuum in the tank is released. To release the tank you should remove one end of the hot water pipe above the water heater and move it just a bit to the side. This allows for air to enter the tank, and now water will start to come out of the drain.

Step 4:

When the tank is fully drained you should flush it using a few gallons of water at a time by turning the water on, but only for a few second, and then letting it to drain out again. Leave the hot side water pump disconnected until the flushing is finished, then reconnect the pipe before refilling the water.

Step 5:

Now you can refill the water heater. Start by disconnecting the drain hose and turning off the drain valve. Reconnect the hot water pipe above the water heater and make sure that it’s tightened well. Now turn the water back on for the water heater. You should now open the hot side of a fixture in your home, such as the sink or a bathtub. Leave it running until all the air has completely left and you are getting only water coming out from the fixture. Now turn the water off.

Step 6:

Now it’s time to relight the water heater. You should relight the water heater pilot, or if it is an electric water heater, turn on the power. Within about an hour’s time, your home should have hot water.

Step 7:

The last step to drain water heater is to check the drain valve. Check if your water heater’s drain is completely closed by looking for any leaks at the spout. If the valve did not completely close, you can place a cap over the hose thread of the outlet to stop the leak from persisting. Another option is to replace the drain valve entirely.


Are you looking to replace your old rental or owned hot water heater in Ontario to an energy efficient model? Are looking to switch from your existing rental water heater provider such as Enercare or Reliance to another supplier? Do you need a bigger size hot water heater?

Call us at 647-847-2998 or request your free water heater upgrade online and receive 2 months fee and the best rental rates in Ontario.

Easy Rentals...

get total piece of mind with our High Efficiency Furnace and Air Conditioner Rental Program.

The post How to Drain Water Heater appeared first on DeMark Home Ontario Furnaces, A/C, Water Heaters.

What To Do If Your Air Conditioner Runs All The Time

It’s perfectly normal for an AC to run frequently during a hot summer day, but if your air conditioner runs all the time then that’s a sign ...